Submitting your project
Congrats on finishing your animation! Here's a small guide and checklist you can follow to make sure your animation is ready for submission!
Setting up a code repository
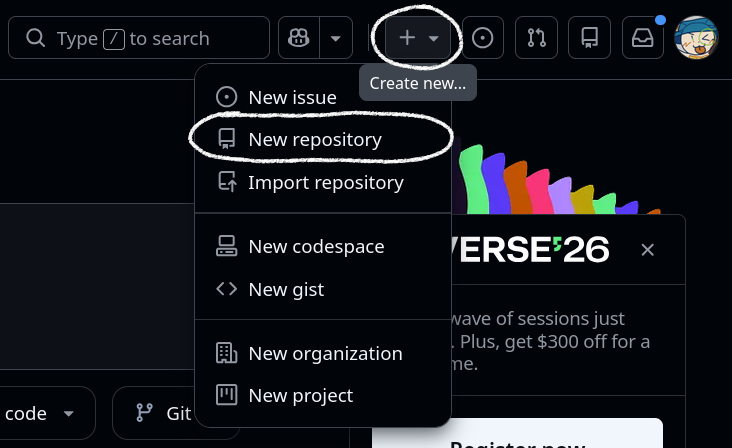
The first thing you want to do is set up a GitHub repository. Sign up (or login) on GitHub. Click on the plus button at the top right, then click 'Create new repository':
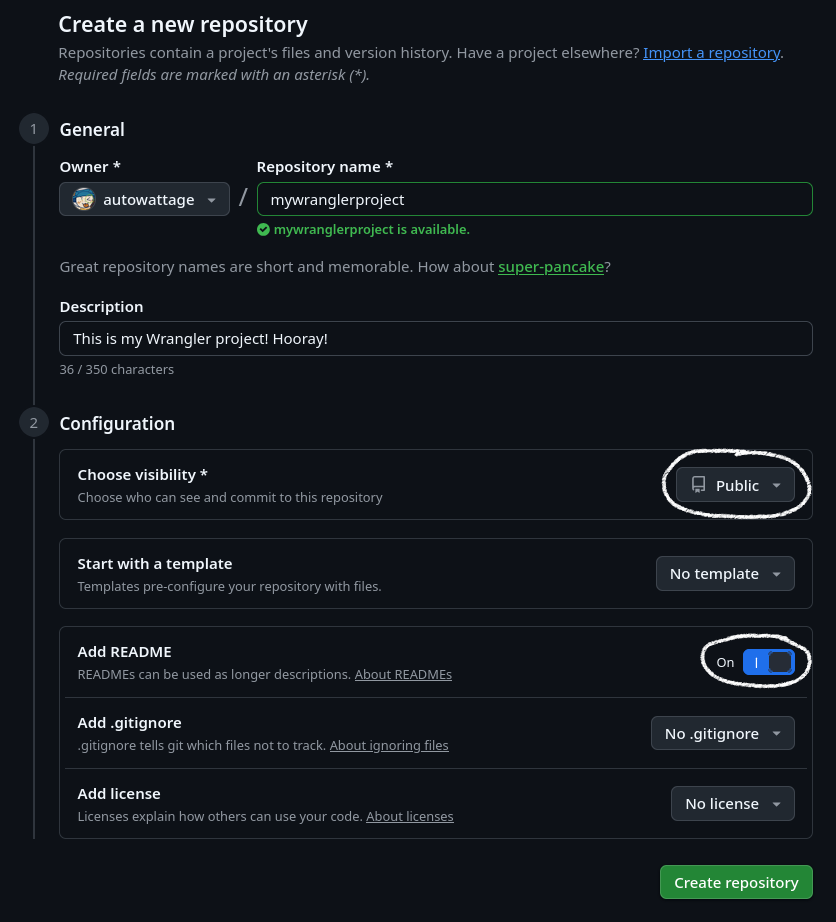
Make sure your GitHub repo is public, and that you've created a README.md:
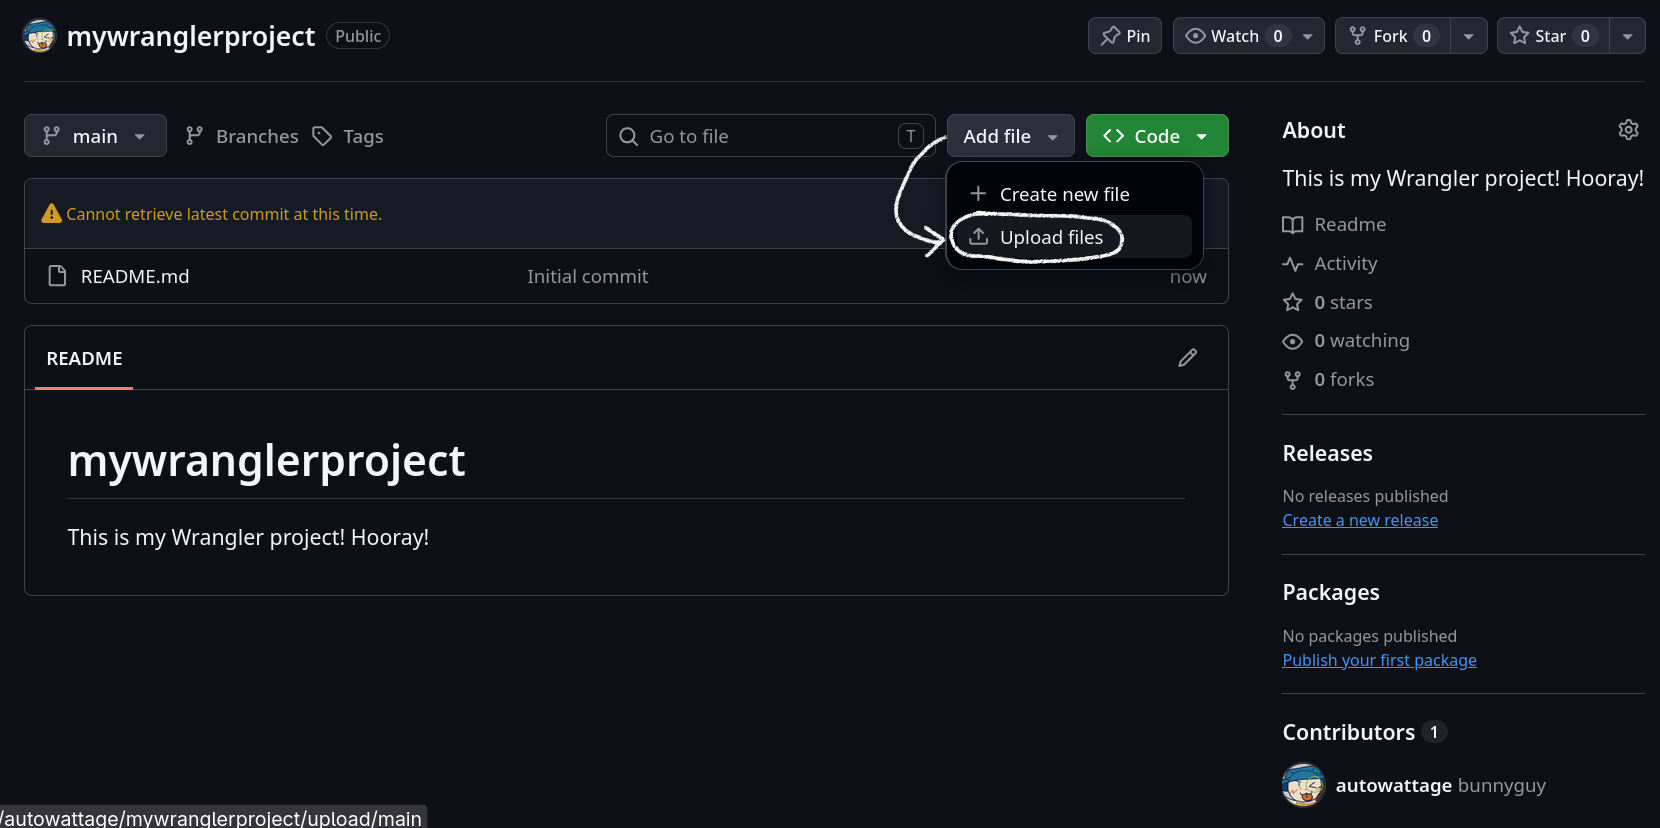
Upload your files by clicking the Add File -> Upload Files button:
After adding all your files, write a descriptive README:
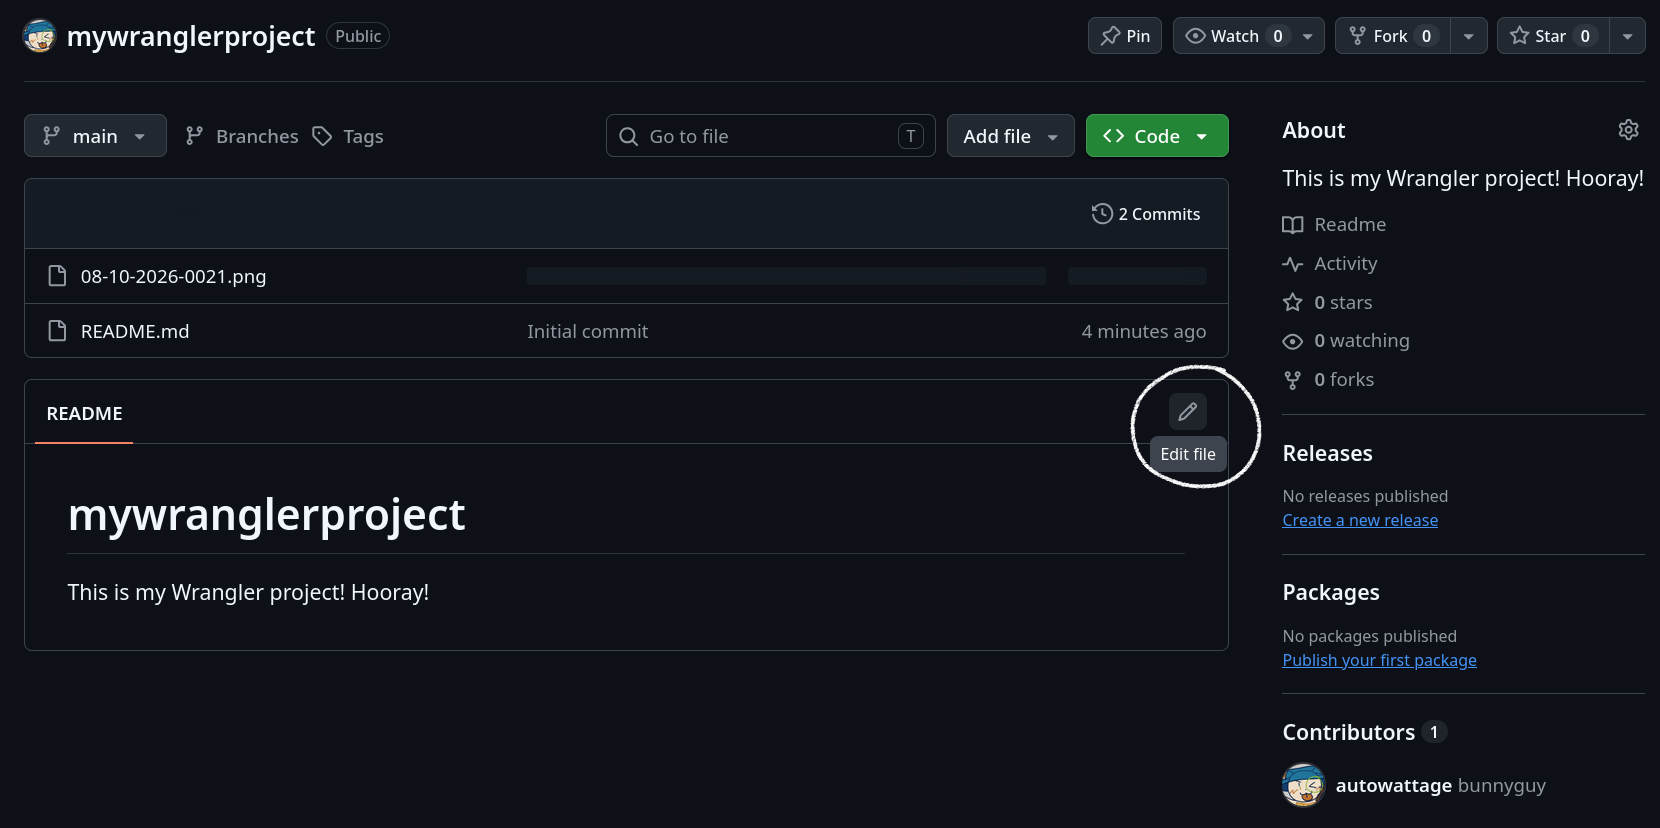
README.md uses the Markdown writing format. In your README.md, talk about:
- What your animation is/what it does
- A video/gif/screenshot of your animation
- How to use/install your code
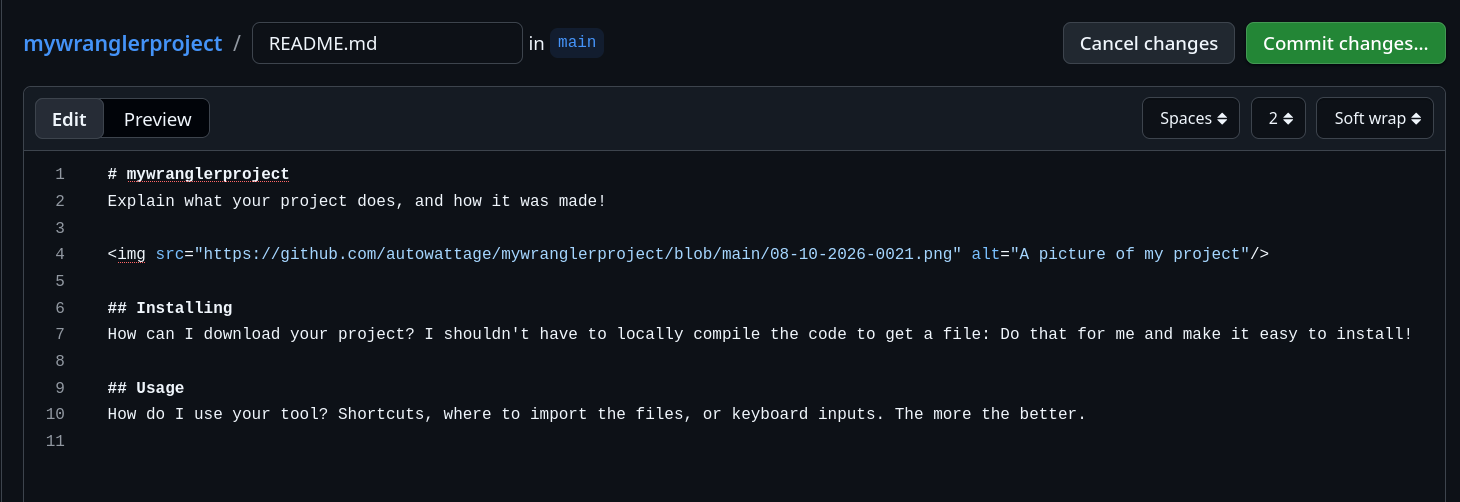
Your GitHub code repository is now complete!
Finding time tracking links
Hackatime
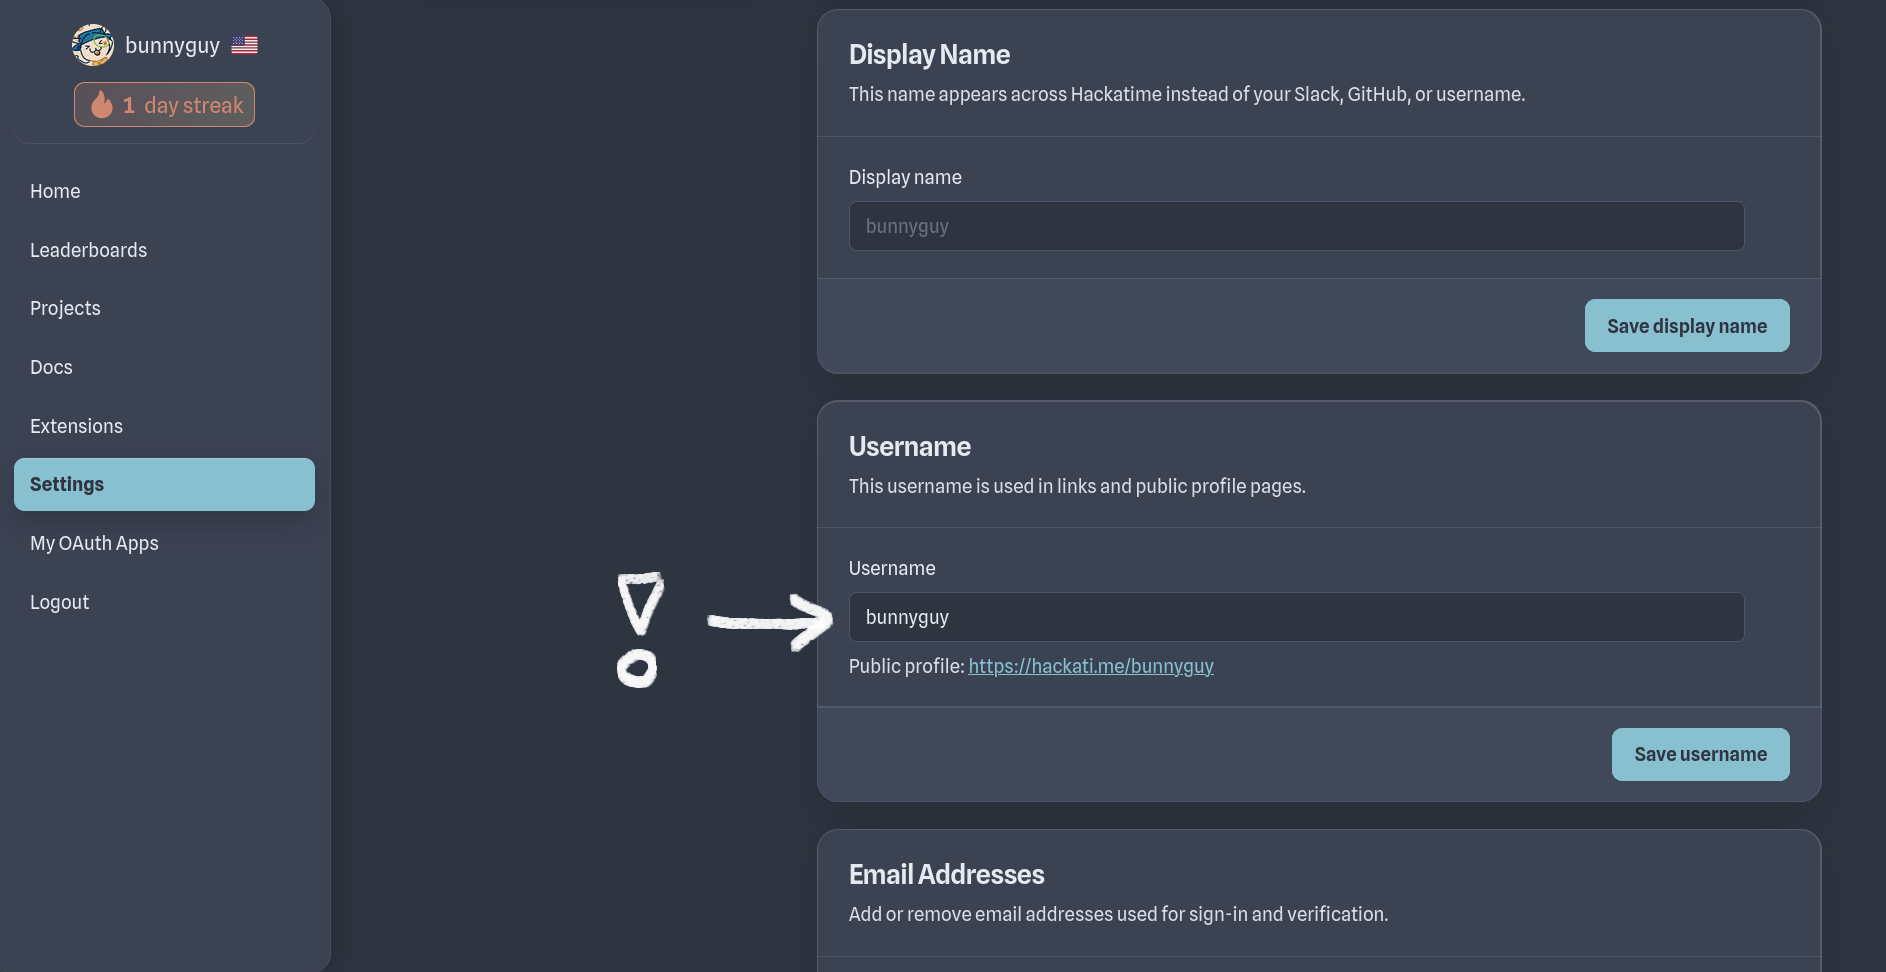
To get a public Hackatime link, set up a username in your settings page.
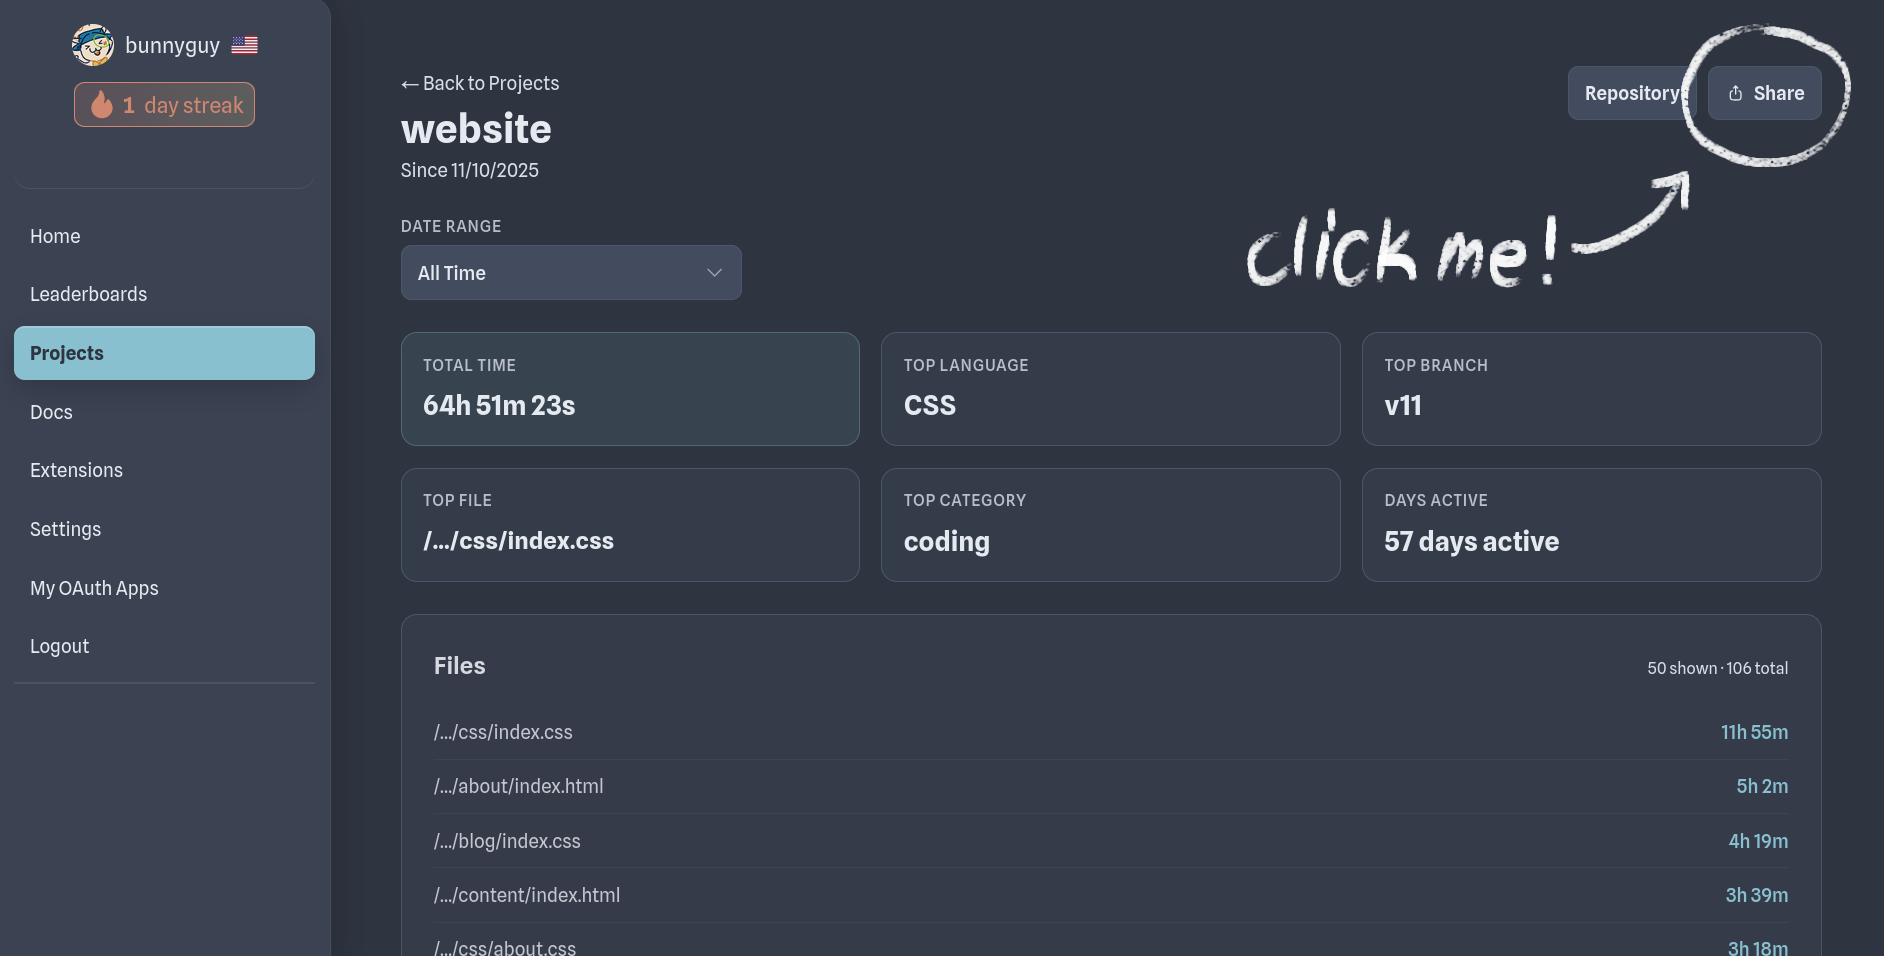
Then go to your projects page. Click on your project, then click on Share!
Lapse/Lookout
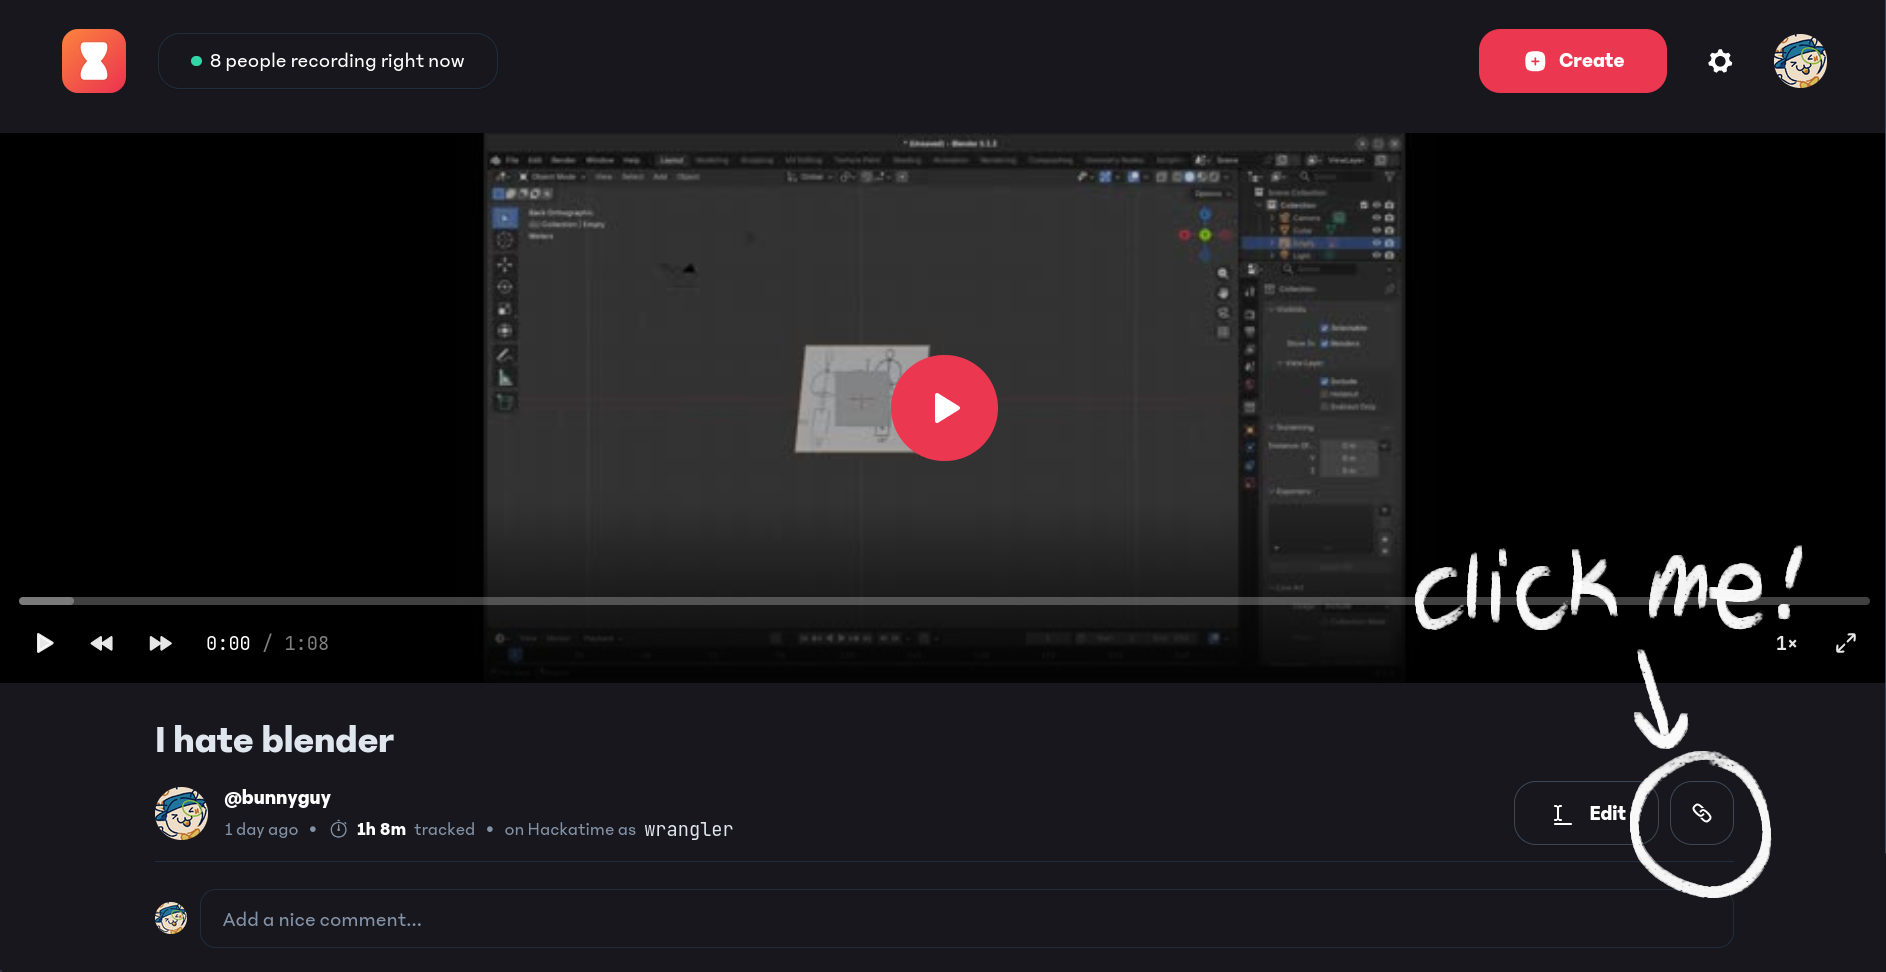
You can get your Lapse recording link at the Lapse website. Go to your profile page on the top right corner. Click on your timelapse, then click the link icon on the bottom right corner of the screen!
Shipping
(note to self: explain how to export animations below)The last thing to do before submitting is to ship your project, which means publishing and sharing your project online. In our case, you'll ship your animation twice!
First, publish your animation on social media so you can get views! Here's a small list of where you could upload your animation:
- TikTok
- Youtube
- Facebook (believe it or not, lots of people use Facebook!)
Make sure to link Keyframe or Hack Club in the description!
Now we need to include a 'demo url' of our project. This can be either a downloadable executable file or a website link- p5.js and three.js projects should publish a website, and Processing projects should have a downloadable.
Publishing a website with Github Pages
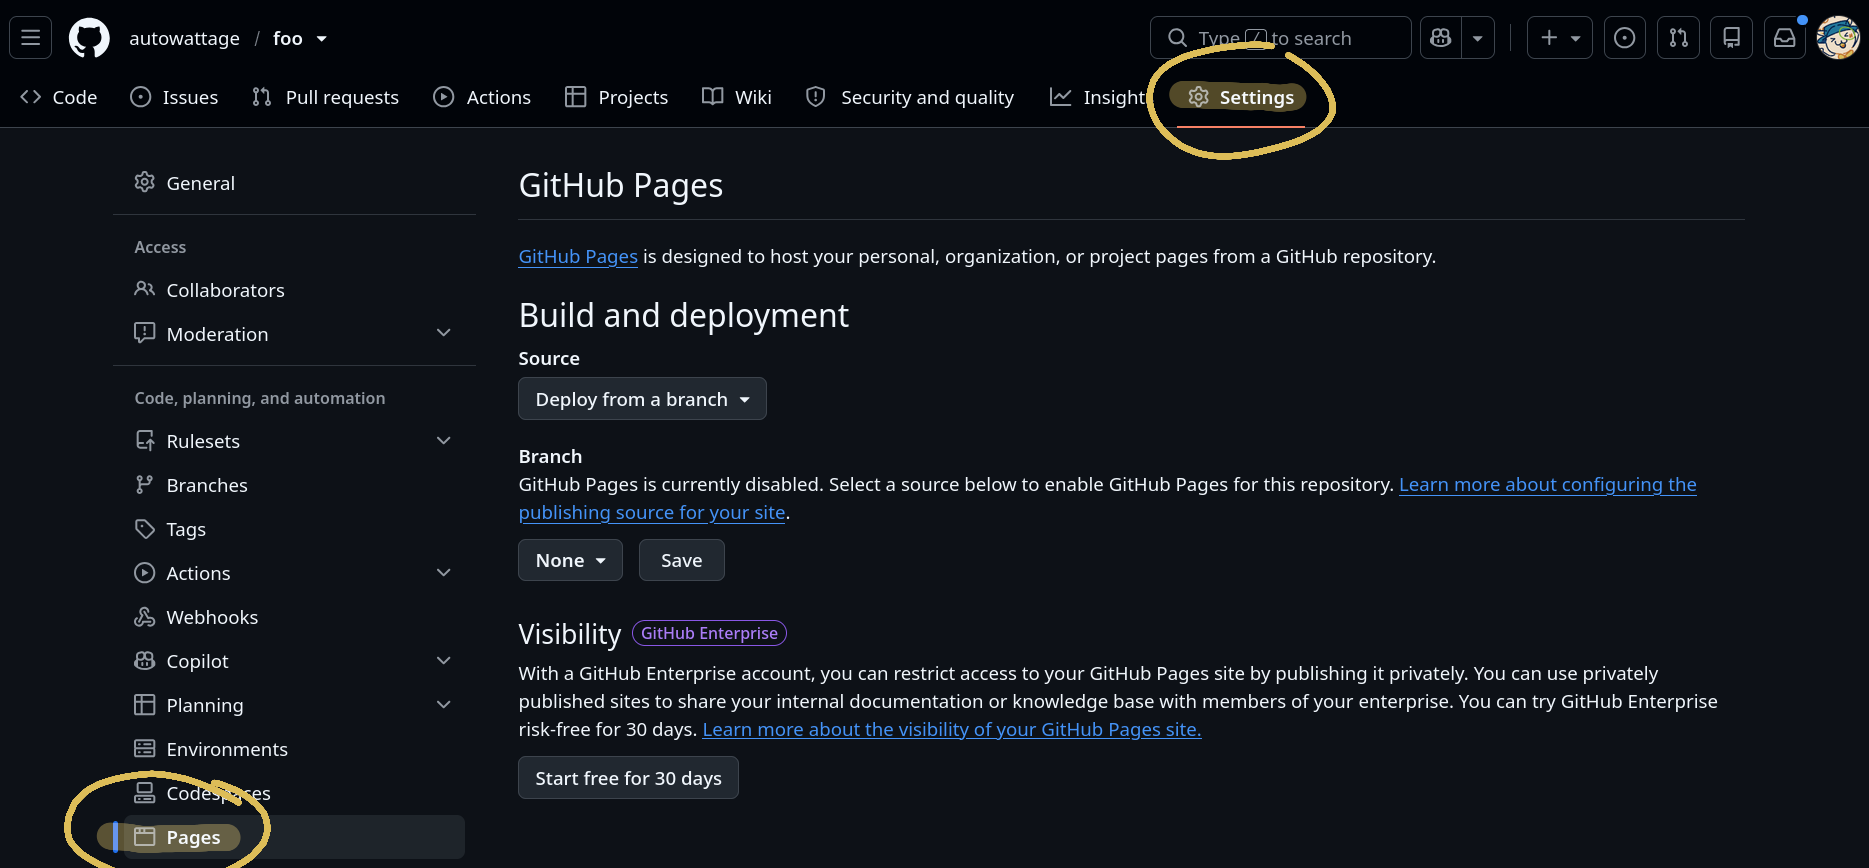
To make a Github Page, you need to first create a Github repository. Then navigate to Settings 🡺 Pages.
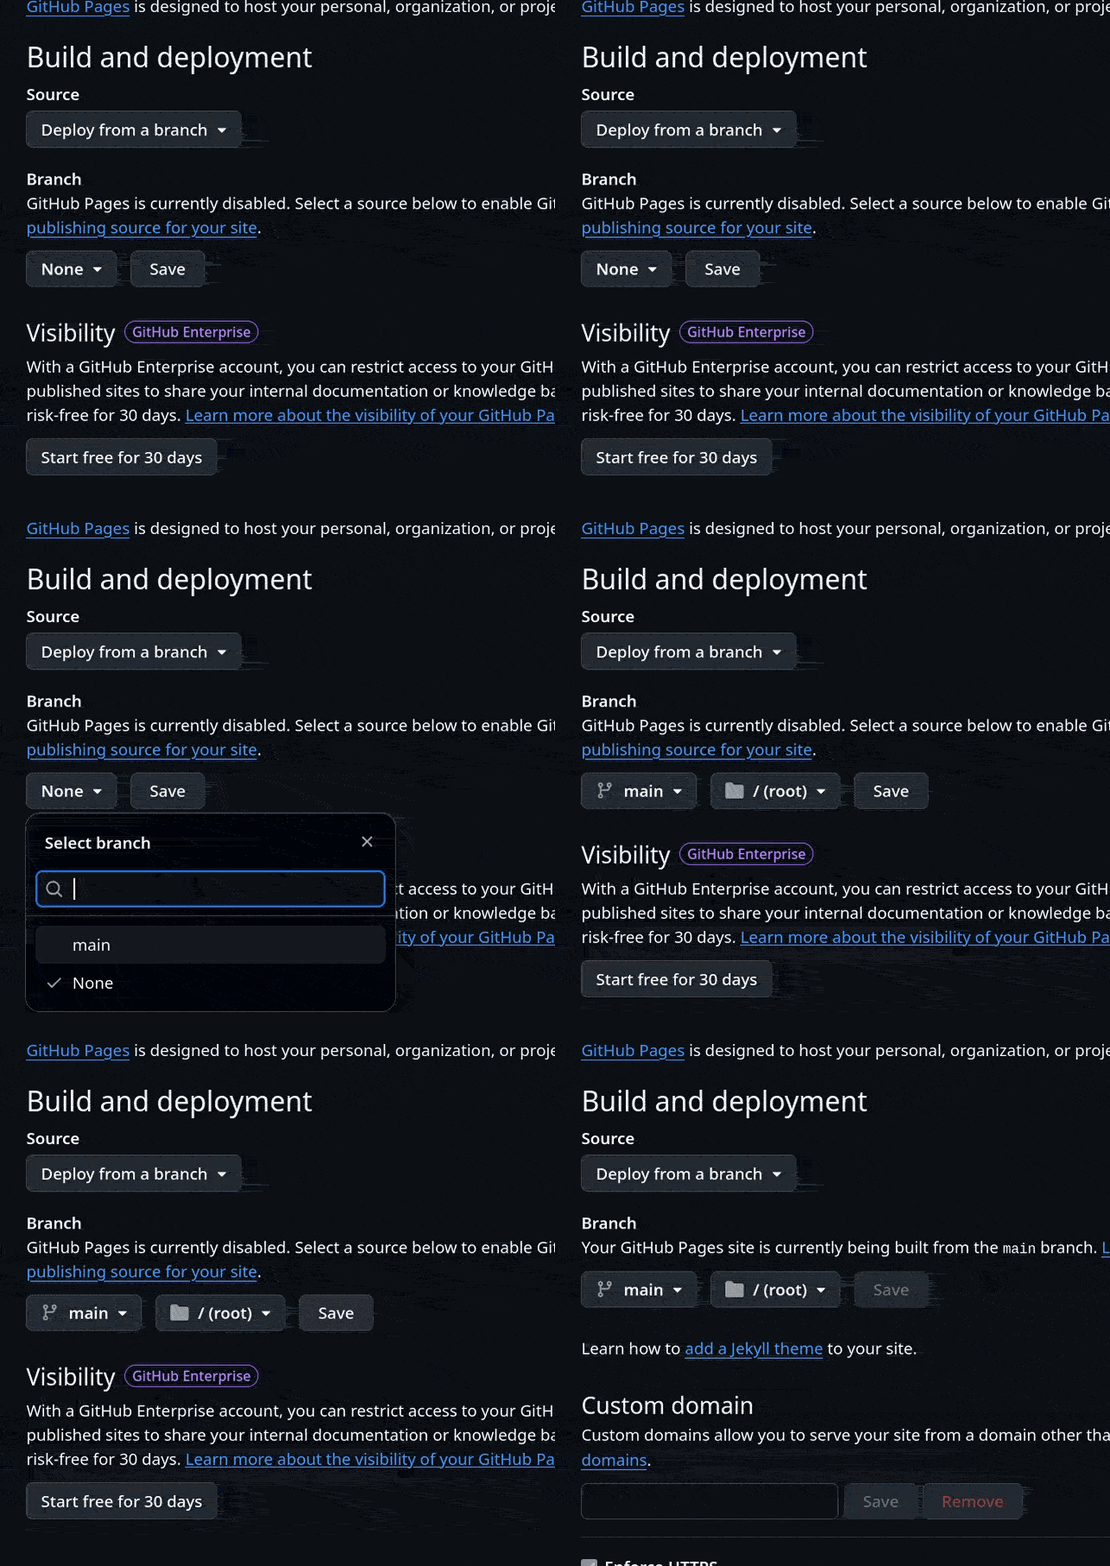
In the Build and Deployment 🡺 Branch selection, select the 'main' (or origin) branch and click save.
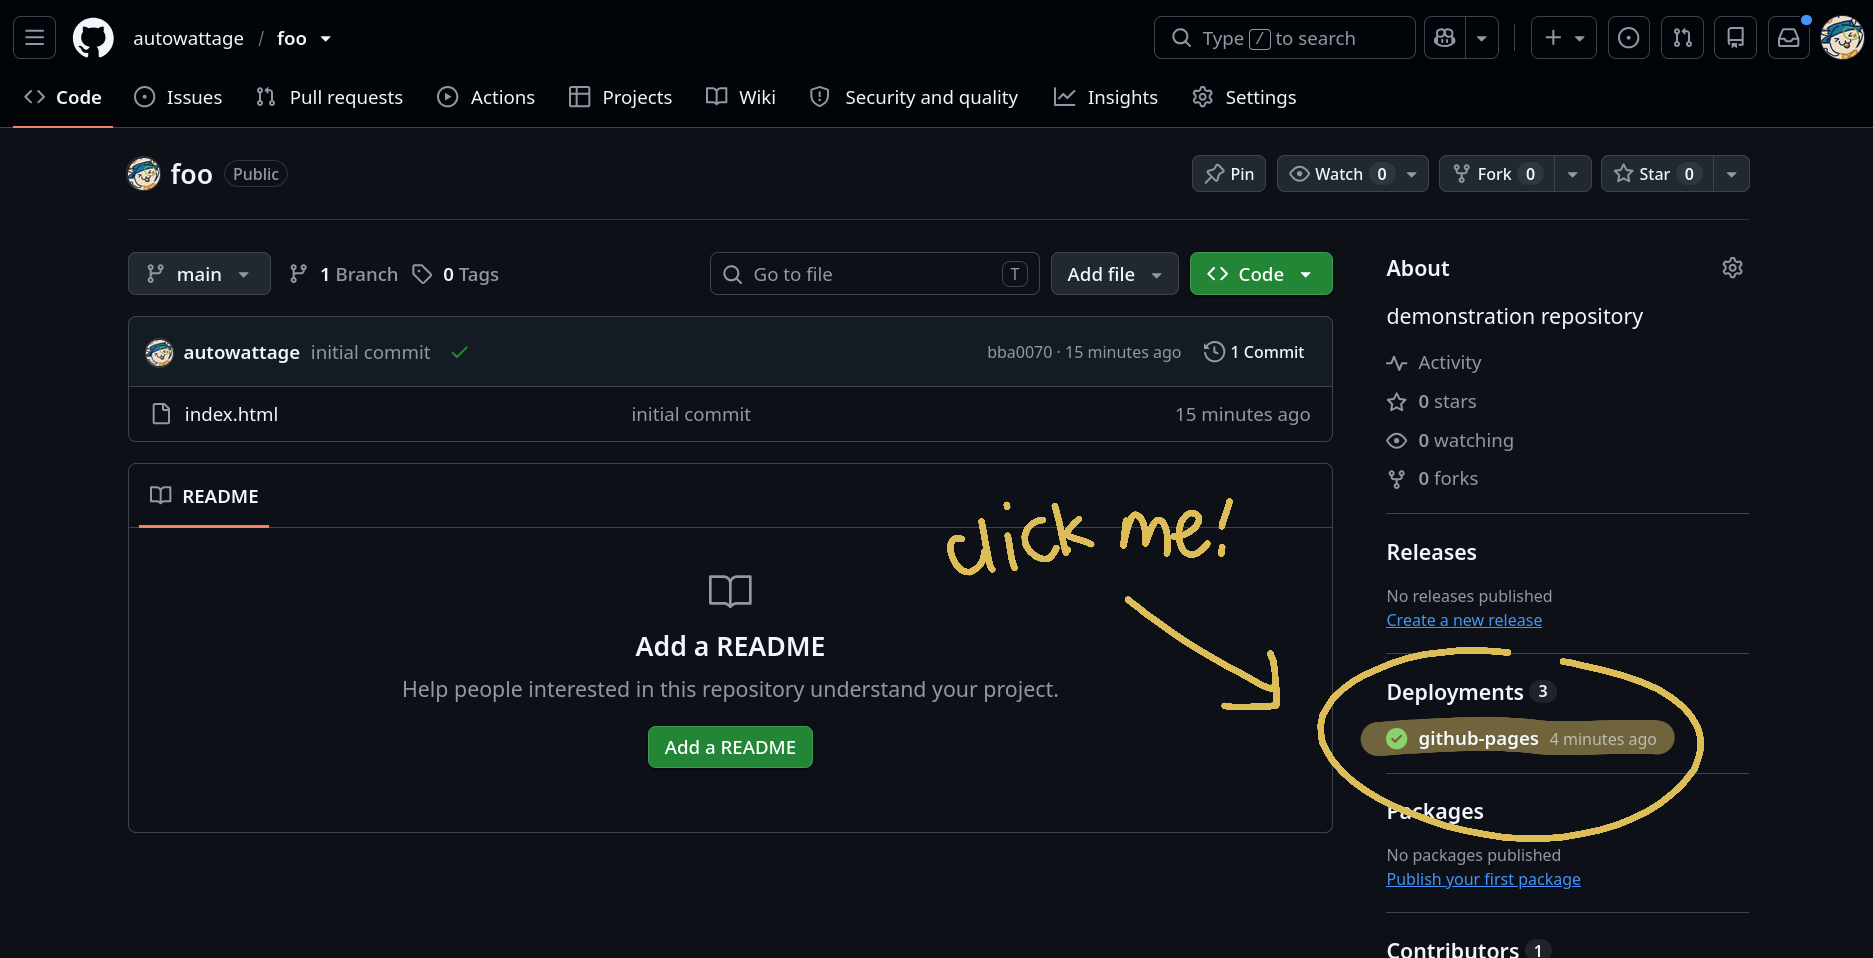
Navigate back to your Github repository and click on your deployment:
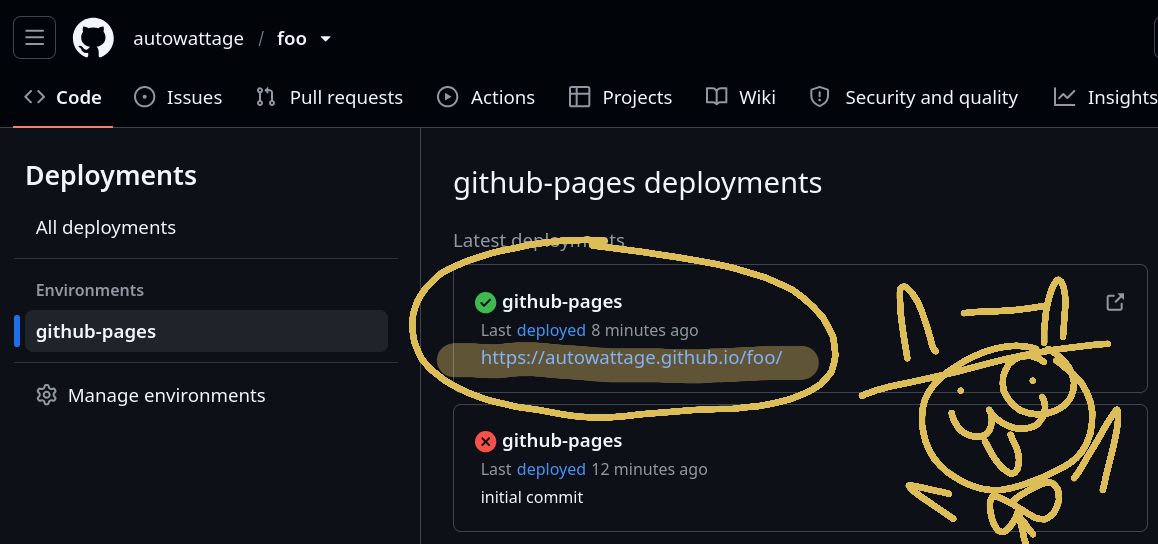
The link to your website can be found in the first deployment! Hooray!
Processing
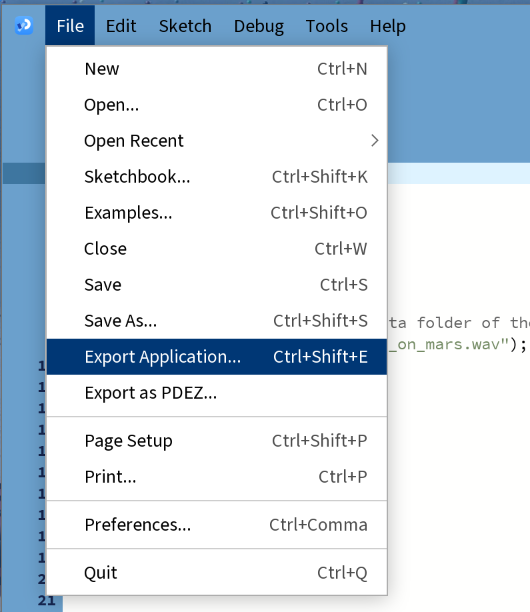
Processing exports downloadable .exe files as its output. To create an executable, go to File 🡺 Export Application.
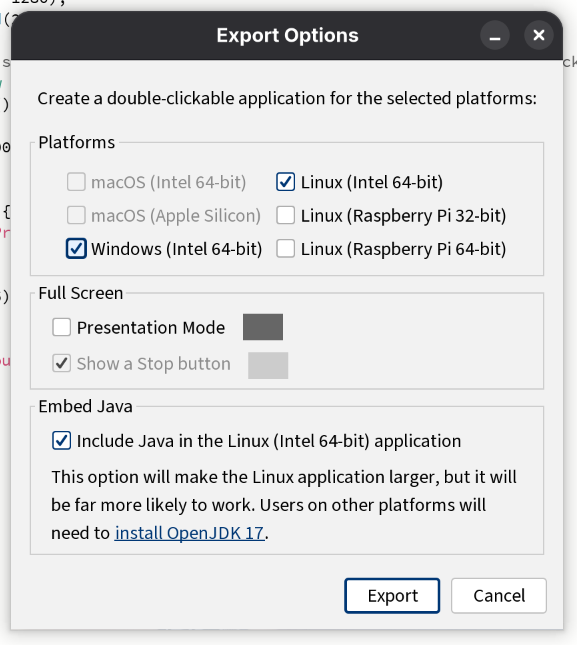
Select 'Windows (Intel 64-bit)', 'Linux (Intel 64-bit)', and 'Include Java in the Linux (Intel 64-bit) application' options.
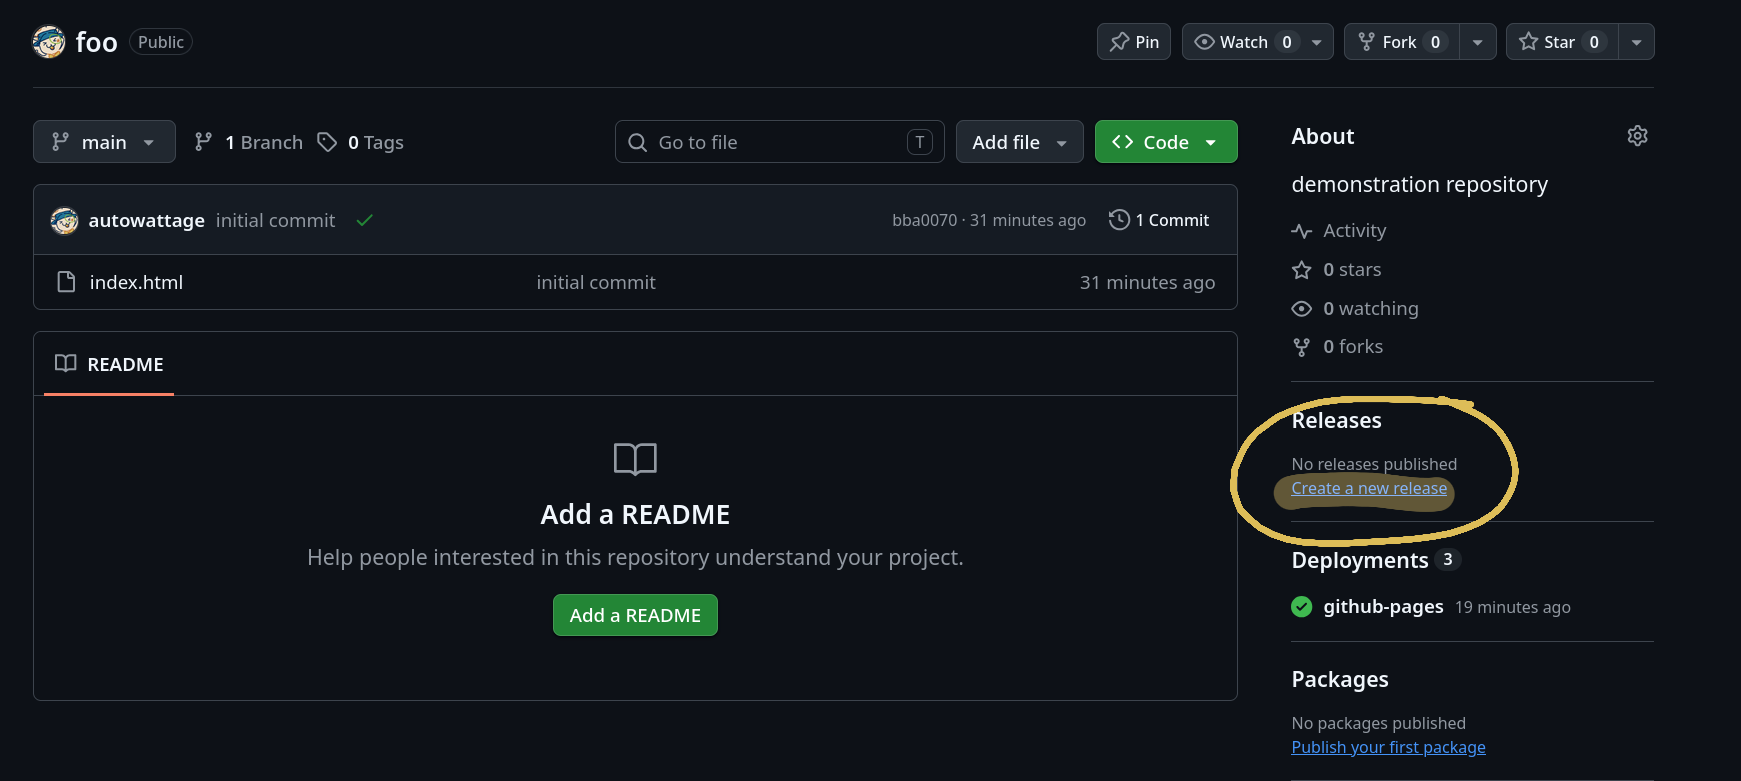
Processing will do its job and open up your sketch directory after it's finished. Zip the two folders (separately), then go to your Github repository.
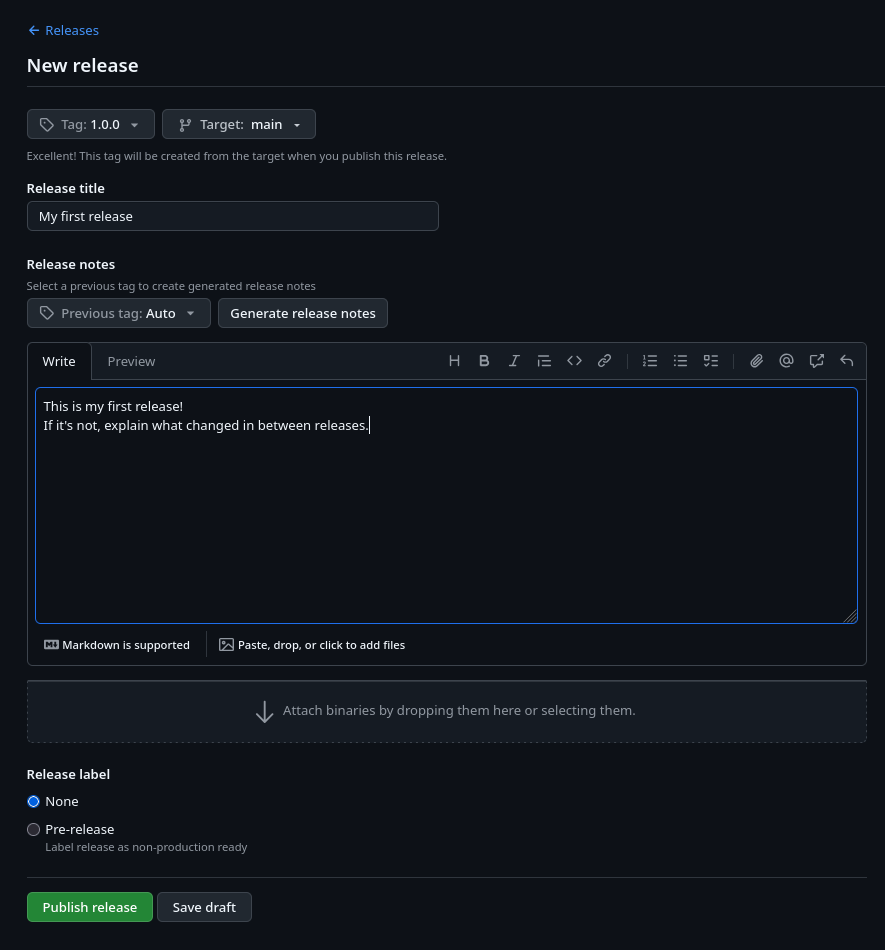
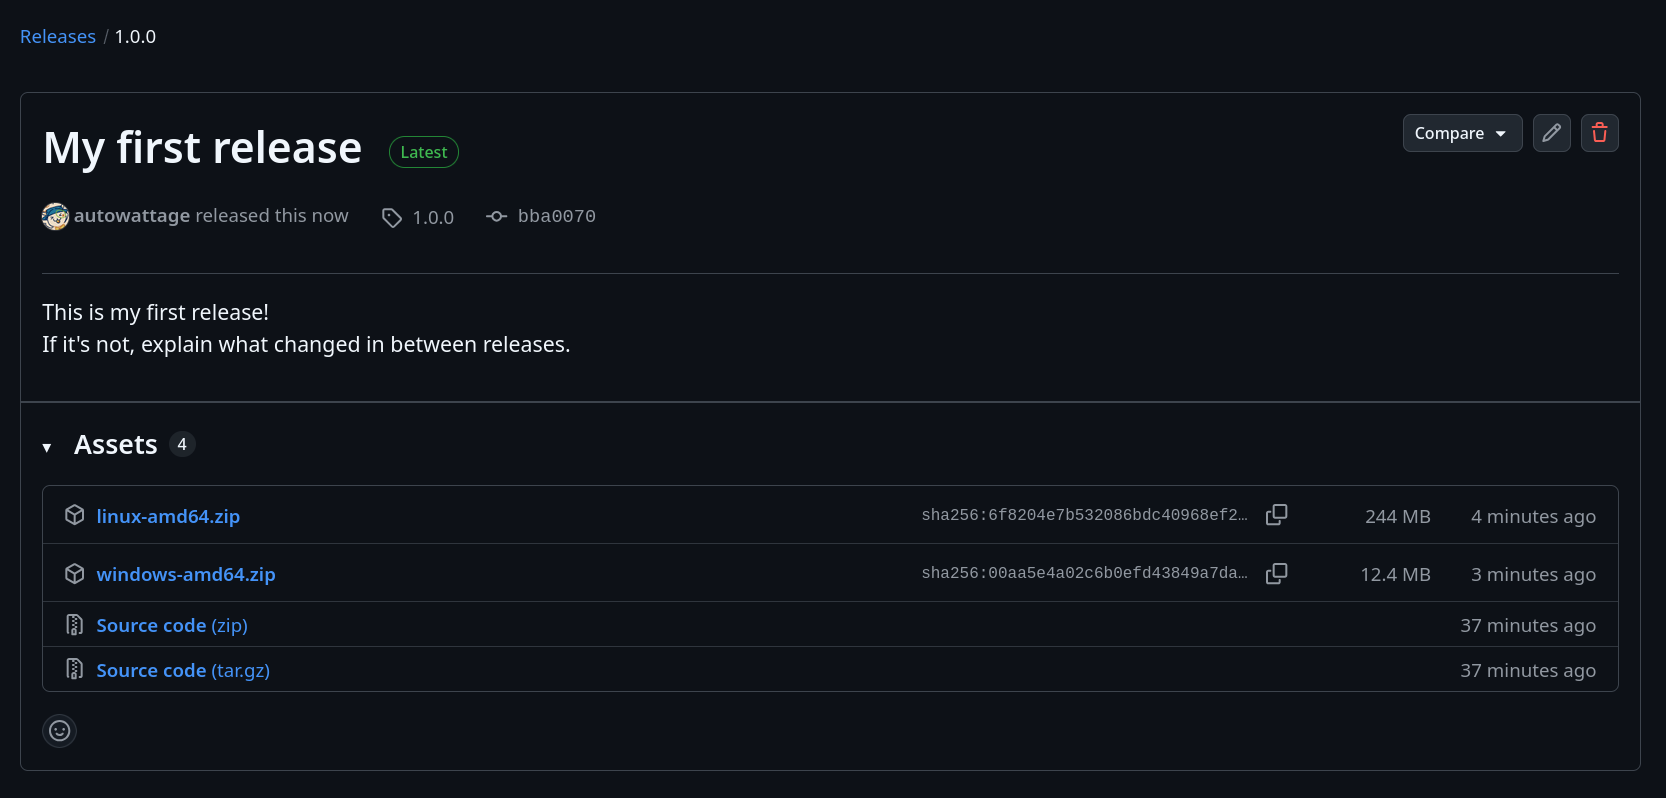
In the New release page, create a tag (usually 1.0.0 for newly finished projects) for your project, write a title and description, and upload your two .zip files into the 'Attach binaries by dropping them here or selecting them'.
You now have a Github release that you can link to as a demo url!
Submitting
Awesome, your project's ready for submission!
submit your project here!